Free Web Hosting Provider - Web Hosting - E-commerce - High Speed Internet - Free Web Page
Search the Web


I got these plans from a good friend named Kal Joren.  A link to his page can be found on the links section.  Go check it out, because its got a lot of cool sabers, and some awesome costumes.

Under Construction; please bear with me while I straighten everything out.


  1

12"x1-1/4" chrome drain extension

Home Depot  
  1

6"x1-1/2" chrome drain extension

Home Depot  
  20

1-1/4" poly washers

Home Depot  
  1

1/2"x1/8" strip of aluminum

Home Depot  
  1 1/2"x1/8" strip of brass Home Depot  
  1 1-1/8" metal hole plug Home Depot  
  1 Plastic axle cover Home Depot  
  1 D-ring assembly Home Depot  
  1 Fujifilm canister Wal-Mart  
  1 Bicycle tire repair kit Wal-Mart  
  -- Sculpy putty Wal-Mart  
  -- Flat Black Paint Wal-Mart  
  -- Copper Paint Wal-Mart  
  -- 2-part Epoxy Wal-Mart  
  1. Cut 6" drain extension according to the following template.  Remember to print the longer side 6" in length.  The section that says do not use should be on the end that bells out.  

  2. Sand down the poly washers edge slightly, and lightly sand the entire ring.  Paint all poly washers flat black.

  3. Paint the control band and the pommel flat black.  Place poly washers on the end of each metal section and place some under the larger sections.

  4. Hammer in the end-cap, then attach d-ring assembly.  Use the Sculpy putty for form an activator box.  Use the Rubber strip from the Bicycle tire repair kit for the grip on that bump on the activator box.

  5. Bend a 6" piece of the aluminum strip so that it looks like the top part of the activator switch.  Use Sculpy putty to fill in the rest of the activator box.  Epoxy that on and then attach the piece of rubber from the bike repair kit for some grip..  Attack 6" of the brass strip to the bottom of the activation bar, bending the end up slightly to as to fit over pommel.

  6. Epoxy everything together as shown, and let everything dry.  Touch up the paint on anything that might have peeled or chipped.  Use the copper paint to color the heat vent just below the emitter head.

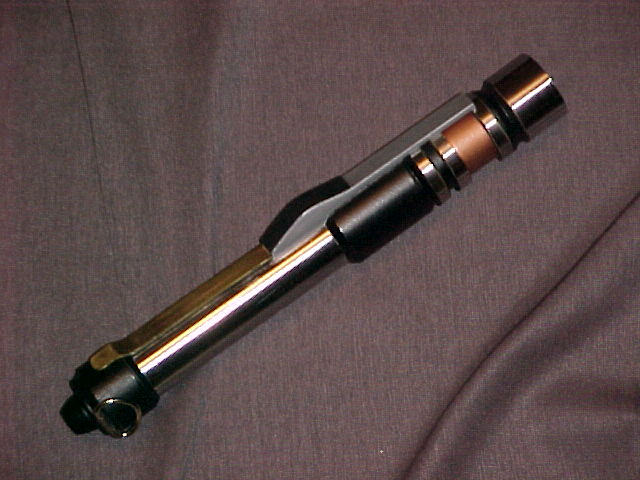
OR

For those of you that know metal-workers, or want to pay the money to have someone grind one on a metal lathe, here is the plans for Kyle saber minus the activator bar.  Picture provided by Jedi135.