|
|||||||
|
|
|
|||||
|
|
|||||||


 Nar Shadda Loading Terminal
This level is often overlooked in the multiplayer world, falling to Canyon Oasis. But, this level has much to offer, Booby traps, great saber duels, and much more.

|
[ What Force Powers to Use ] Light Powers Dark Powers Advantage? |
[ What Guns to Use ] . . . . |
[ Level Breakdown ] . . . . |
[ Extra Info ] . . . . |

Generic Powers
Light Side Powers
Dark Side Powers
Advantage? The advantage in Nar Shadda Loading Terminal Goes to Light/Generic Powers. Using the right mix of these will give you an advantage. Make Pull, Absorb, Health, Jump your heavy hitters. I know its tempting to go after that concussion rifle and start blasting away, but hold on there buddy. That gun would only be effective for sitting on the catwalks, and as we all know, if you snipe once, you won’t snipe again. If you kill one person sniping that same person will come back and kick you out of there so fast you wont be able to say Qui Gon Jinn. They know where you are and they are ready for you. Stick with your Rail detonator, a good mix of the primary and secondary function sould do fine. Another great choice is the mines. You can lay these on the catwalks or anywhere you want, narrow passage ways work the best. For your best bet, go with the repeater, just hold fire and strafe. Everyone is going to be going for that concussion , just put your crosshairs on it, go invisible and wait Most of the battles will happen in one of these three locations.  Force Jump
This force power quite handy as it allows you to get from the loading station to the catwalks above very quickly, (this is its biggest advantage), you can also use it to get the force powerups in the back of the station. Other than that it is used for avoiding blasts and running away. 2-3 stars
 Force Sight
Sight is needed only if you need to see those persuasive Jedi. But one handy use is to turn it on to see when people are coming off the elevator so you can launch those thermal detonators their way! You can also wait around corners and behind doors and see when players are about to come into view. 1 star
 Force Speed
If you are one of those speed freaks I can’t stop you but, why would you need it on this level, use the extra star on something useful0 stars
 Force Pull
This is useful on any level with guns, one quick keystroke and that big boy with the concussion rifle suddenly isn’t so tough. The more stars you add, the greater the distance you can pull from. I personally like mine high, but you are your own jedi. What works best for you? 3-4 stars
There really is no advantage to where you play, persuasion is handy because of the many corners you can wait around. But the upper level catwalks are dark so persuasion could work. MIX IT UP!
 Force Healing
You can always use this handy little force power, witch gives you 20hp for each star you have. Use a few on this level, there are only two health boosts. But the health droid will give you a full refill of your hp 2-3 stars
 Force Persuasion
This force power works well on this level because of the availability of sniper positions above the loading terminal. I personally love this force power and use it all the time, but beware of force sight, if you are going to use it to kill, make it a quick kill!3-4 stars
 Force Blinding
This force power is great on other levels with high drops or saber combat, but neither happen here often. Plus, when you use blinding on a jedi, they either run from you, or go crazy and shoot at everything!0-1 stars
 Force Absorb
This is another power I always use, if you are in the field with a gripper, you now have him taken care of. A puller? His effects are cancelled also. The ultimate protection, now no force power can alter you! A must if you want to keep that gun in your hands3-4 stars
 Force Protection
I wouldn’t recommend protection for this level, pull and jump are worth more, and besides, people usually consider this power unfair.
the darksiders should keep it near the bottom, so destruction can knock you out into space, plus those little walls can act as destruction catchers.
 Force throw
Not much to throw, a couple of boxes on the catwalks? Maybe 0-2 stars
 Force grip
I guess this force is usable on every level, and if its how you play go for it. Just remember, the light will destroy the dark 4 stars
Force Lightning
This is used by newbies isn’t it?? Boy, a lot of dark powers are worthless0 stars
 Force Destruction
A handy offensive weapon for only half your mana. This could be effective, as it is a very open level. But again cancelled by an experienced light jedi with absorb.
 Force Deadly Sight
Using this on this level would work as it provides many open walkways and areas to use it on, but remember, you now only have 3 effective offensive powers at your disposalWhat Guns to Use
Level Breakdown
Area 1,viewing the loading terminal from the catwalks. The only sniper position, use it sparingly. These catwalks are great to use persuasion on! Target the door from the health bot room and fire away!! | 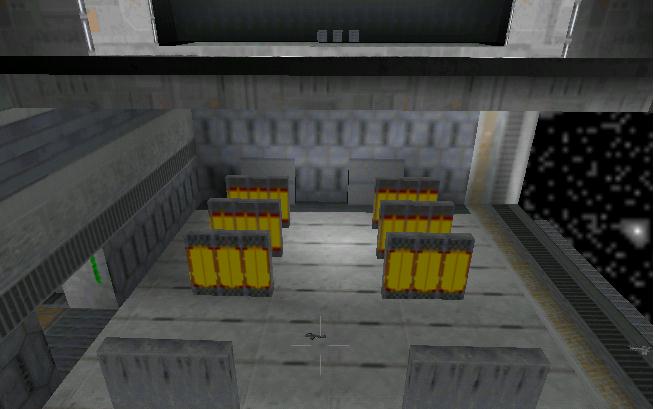 |
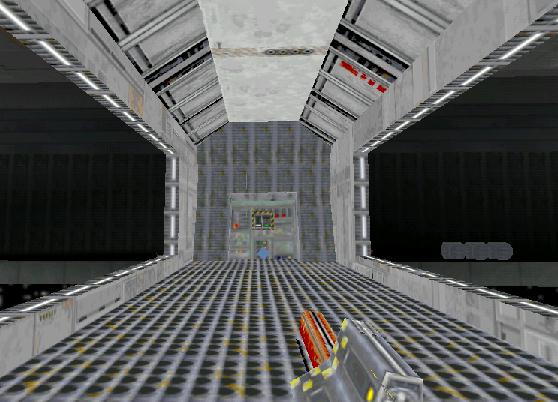
Area 2,Upstaris, On the long corridor. My back is to the medical droid, I’m in prime booby trap area! | 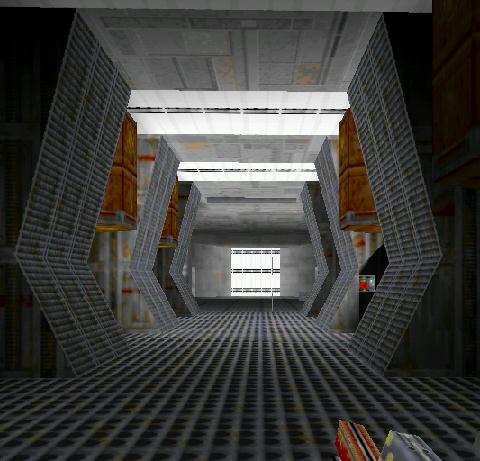 |
Area 3,In the back of the terminal. The force powerups are here, wide open for explosive weapons. Move through here as quickly as possible | 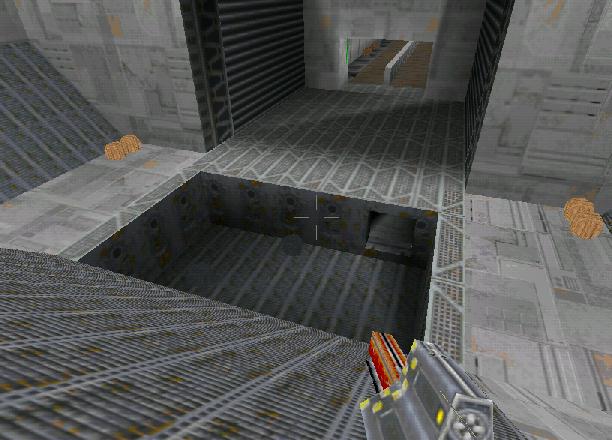 |